
Build AI applications with OpenAI, Python and FastAPI
A step-by-step guide on leveraging OpenAI's latest AI capabilities in your application.


Artificial intelligence is rapidly becoming an integral part of modern software development, and OpenAI is at the forefront of this trend. By integrating OpenAI's API into your application, you can leverage the latest and greatest in AI technology to enhance your project in several ways.
In this article, I'll provide a detailed guide on how to:
Set up your OpenAI API account and API key.
Set up a simple To-do app with the python framework FastAPI.
Add Artificial intelligence capabilities to the app with prompt engineering and OpenAI's GPT-3 language model to give ai-generated advice on how to complete any new task added to the app.
Discuss some of the benefits and potential applications of using OpenAI's AI technology in your application.
Setting up your OpenAI account and API key
To create an OpenAI account and obtain an API key, you can follow these steps:
Go to the OpenAI Website and click on the "Sign Up" button to create an account. You will be prompted to enter your email address and password.
Once you have signed up and logged in, you will be taken to the OpenAI dashboard.
In the dashboard, click on your account button and "View API keys".
Under the "API keys" section, click on the "Create new secret key" button.
You will be given an API key, which you can use to access OpenAI's API services.
Be sure to keep this key safe and secure, as it provides access to your OpenAI account. We'll be returning to it soon.
Setting up your AI To-do application
One of the most common use cases for building an API is creating a to-do application, where users can manage a list of tasks. To showcase the integration of OpenAI API into any application first we will set up a simple to-do application using the FastAPI framework. Then we will add AI capabilities to give instructions on how to complete any task that the user wants.
Setting up the project
First, we'll create a new directory and python environment. Then install the required dependencies for the project.
Create new directory for the app and navigate into it.
 $ mkdir ai-todo-app
 $ cd ai-todo-app
Create a new python virtual environment and activate it.
 $ python3 -m venv .venv
 $ source .venv/bin/activate
Install the necessary dependencies. The
uvicornpackage is an ASGI server andpython-dotenvhelps load environment variables into the project.$ pip install fastapi uvicorn
Creating To-do app
One of the main advantages of using FastAPI is how fast you can get up and running with a simple application. Let's do it:
Create a
main.pyfile with the following code. Here we create a FastAPI instance called app and define the necessary endpoint to create, read, update and delete tasks for our To-do application.from fastapi import FastAPI app = FastAPI() class Task(BaseModel): id: int title: str description: str done: bool tasks =[] @app.get("/tasks/") async def read_tasks(): return tasks @app.post("/tasks/") async def create_task(task: Task): tasks.append(task) return {"id": len(tasks)} @app.put("/tasks/{task_id}") async def update_task(task_id: int, task: Task): tasks[task_id - 1] = task return {"success": True} @app.delete("/tasks/{task_id}") async def delete_task(task_id: int): tasks.pop(task_id - 1) return {"success": True}Add the base model for our tasks. They should have and id, title, description and done status. Add this at the top of the file.
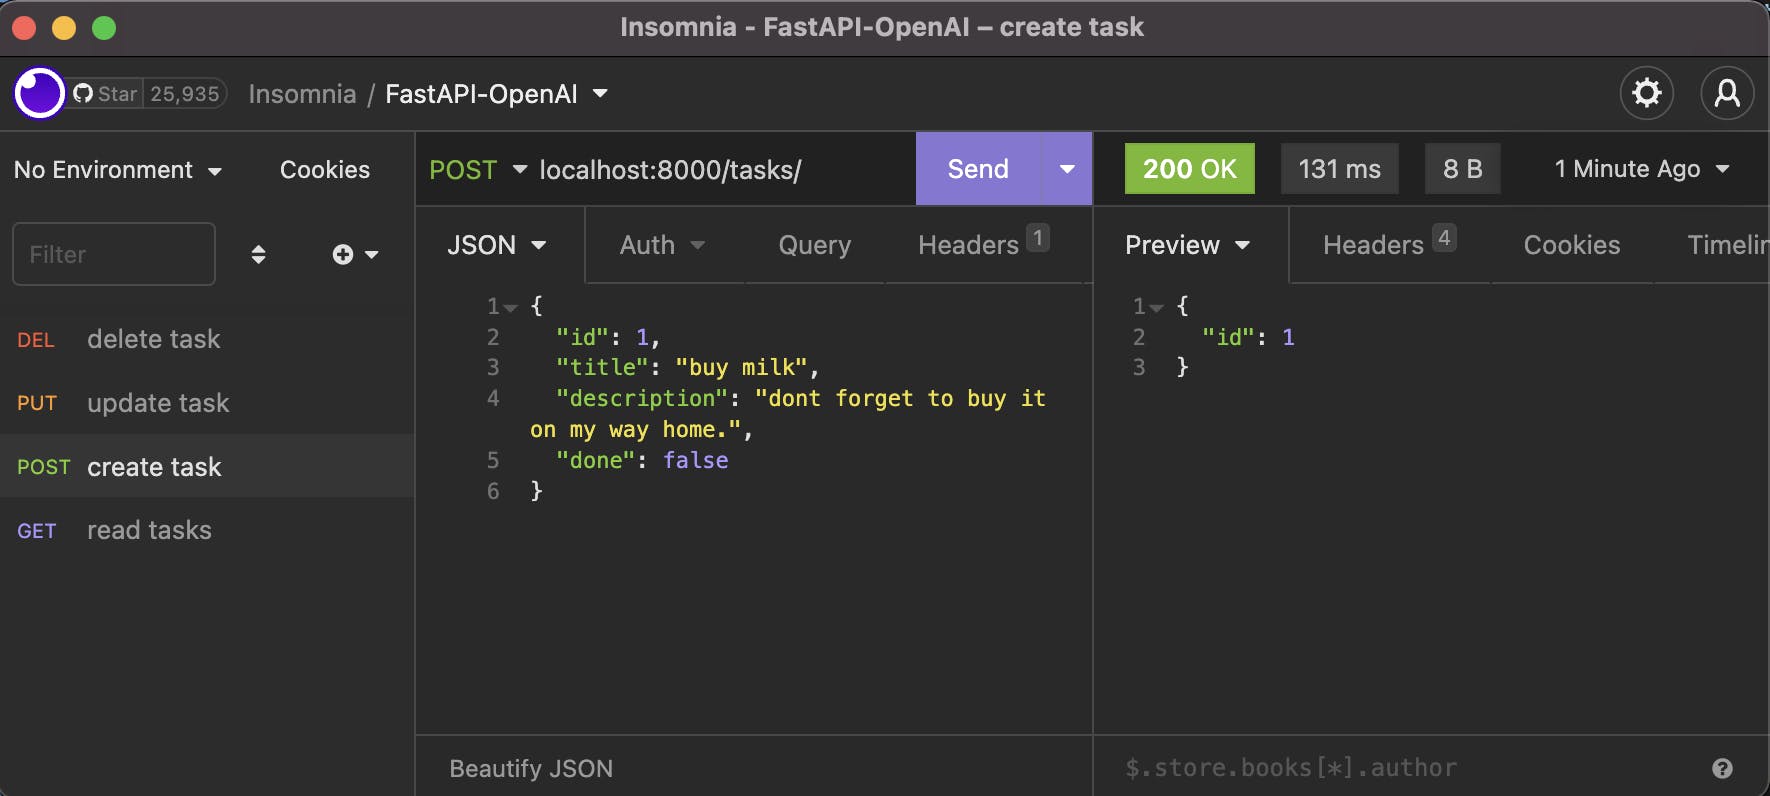
 from pydantic import BaseModel

 class Task(BaseModel):
     id: int
     title: str
     description: str
     ai_advice: str = ""
     done: bool
Test your app with Insomnia or Postman by creating a task with a POST request and a JSON body to our /tasks/ endpoint.
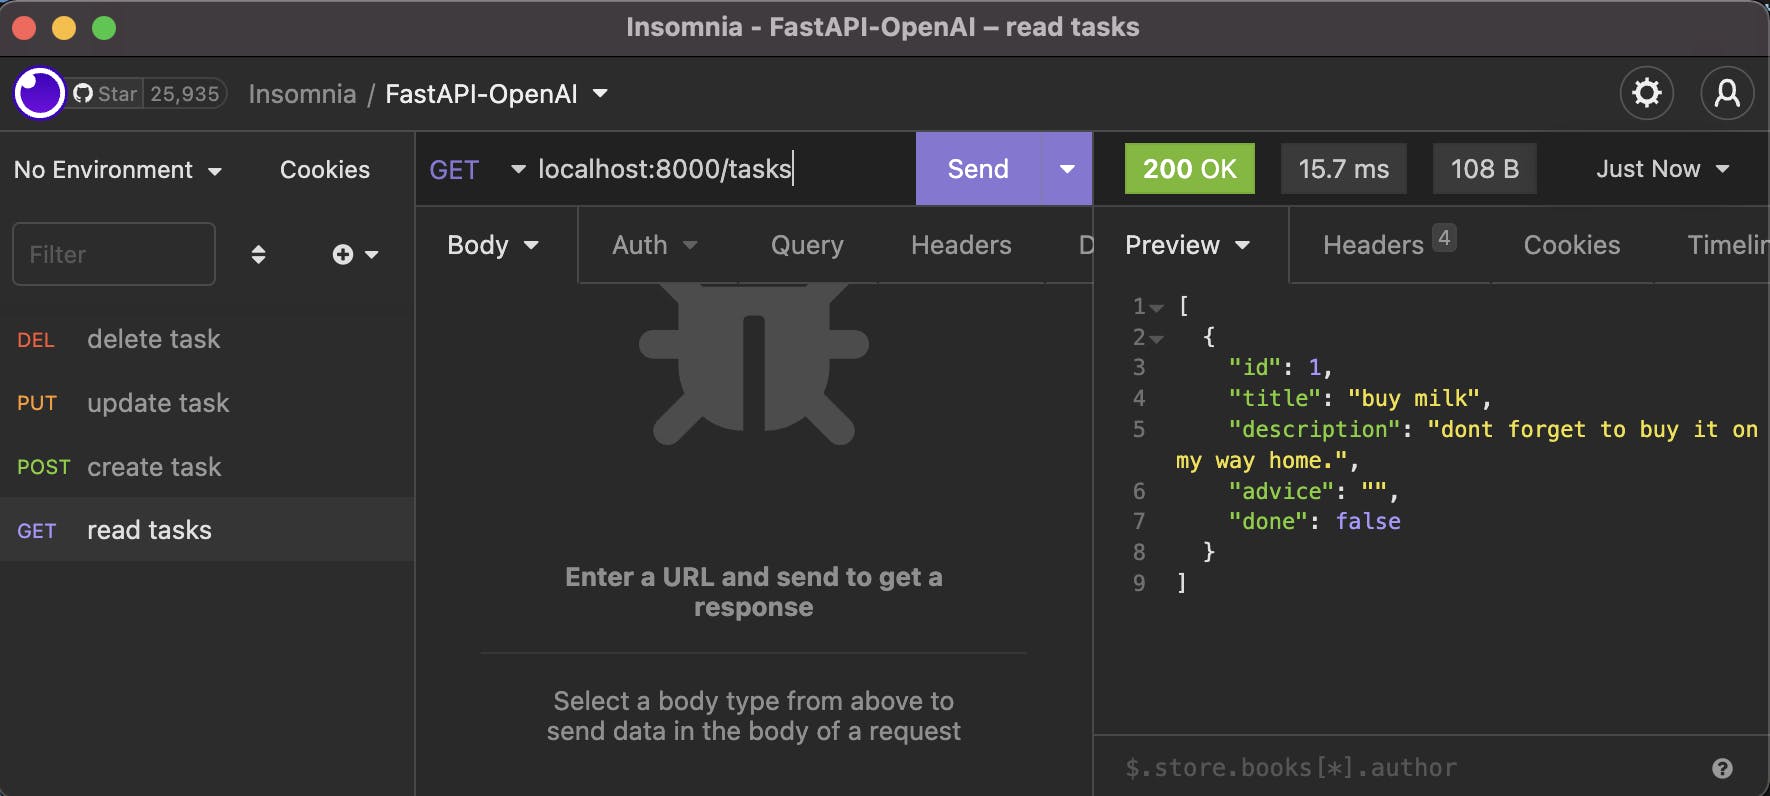
Check that the created task was saved by reading all tasks
Try creating multiple tasks, update, delete and read them. You should have a fully functioning To-do App backend ready! Now let's add Artificial intelligence to suggest how to complete each one.
Using the OpenAI API in your FastAPI project
Now, for every task that our user creates, we would like to add advice on how to complete it. For that, we will use Prompt engineering to create a specific prompt based on the title and description given. Then pass it down to the OpenAI Completion API to get back an AI-generated plan on how to complete each new task.
Install the
openaipython library into your project to access the OpenAI API andpython-dotenvto load and protect our OpenAI API Secret Key that we previously created.$ pip install openai python-dotenvCreate a
.envfile in the same directory as themain.pyfile and write your API keyOPENAI_API_KEY=PASTE_YOUR_API_KEY_HERENow let's import the
openailibrary intomain.py, load the environment variables from the.envfile and set our api_key.import openai import os from dotenv import load_dotenv load_dotenv() openai.api_key = os.getenv("OPENAI_API_KEY")To give advice on a task let's create a new function in
main.pythat takes care of generating the advice. For this, it shouldCreate an adequate prompt from the title and description of each task.
Send the request to the OpenAI Completion API with the necessary model parameters (details below).
Extract the ai-generated advice from the response object.
```python
async def advice_from_openai(task: Task):
    prompt = f"Write advice on how to achieve the task titled '{task.title}' with description '{task.description}'",
    response = openai.Completion.create(
        model="text-davinci-003",
        prompt=prompt,
        temperature=0.3,
        max_tokens=150,
        top_p=1.0,
        frequency_penalty=0.0,
        presence_penalty=0.0
    )
    text_advice = response.choices[0]["text"]
    return text_advice
```

Here are the parameter details for the request. For more information check the [OpenAI API documentation](https://beta.openai.com/docs/api-reference/completions/create#completions/create-model).

* `prompt`: The text prompt that the API will use to generate completions. This can be a single sentence or a series of sentences.

* `model`: The name of the language model that the API will use to generate completions. The API currently supports several models, including "davinci", "curie", "babbage" and "ada".

* `max_tokens`: The maximum number of tokens (words or word pieces) that the API will generate in the completion.

* `temperature` : A value that controls the "creativity" of the API's output. A higher temperature will result in more varied and "creative" completions, while a lower temperature will result in more conservative completions that stick closer to the input prompt.

* `top_p` : A value that controls the proportion of the most likely tokens to consider when generating text.

* `frequency_penalty` : A value that penalizes more common words in the generated text.

* `presence_penalty` : A value that penalizes tokens that are already present in the input prompt.
Update the
create_taskfunction@app.post("/tasks/") async def create_task(task: Task): task.ai_advice = await advice_from_openai(task) tasks.append(task) return {"id": len(tasks), "ai-advice": task.ai_advice}Test the updated application by creating new tasks! Let's ask for advice on buying milk with bitcoin and see what it says.
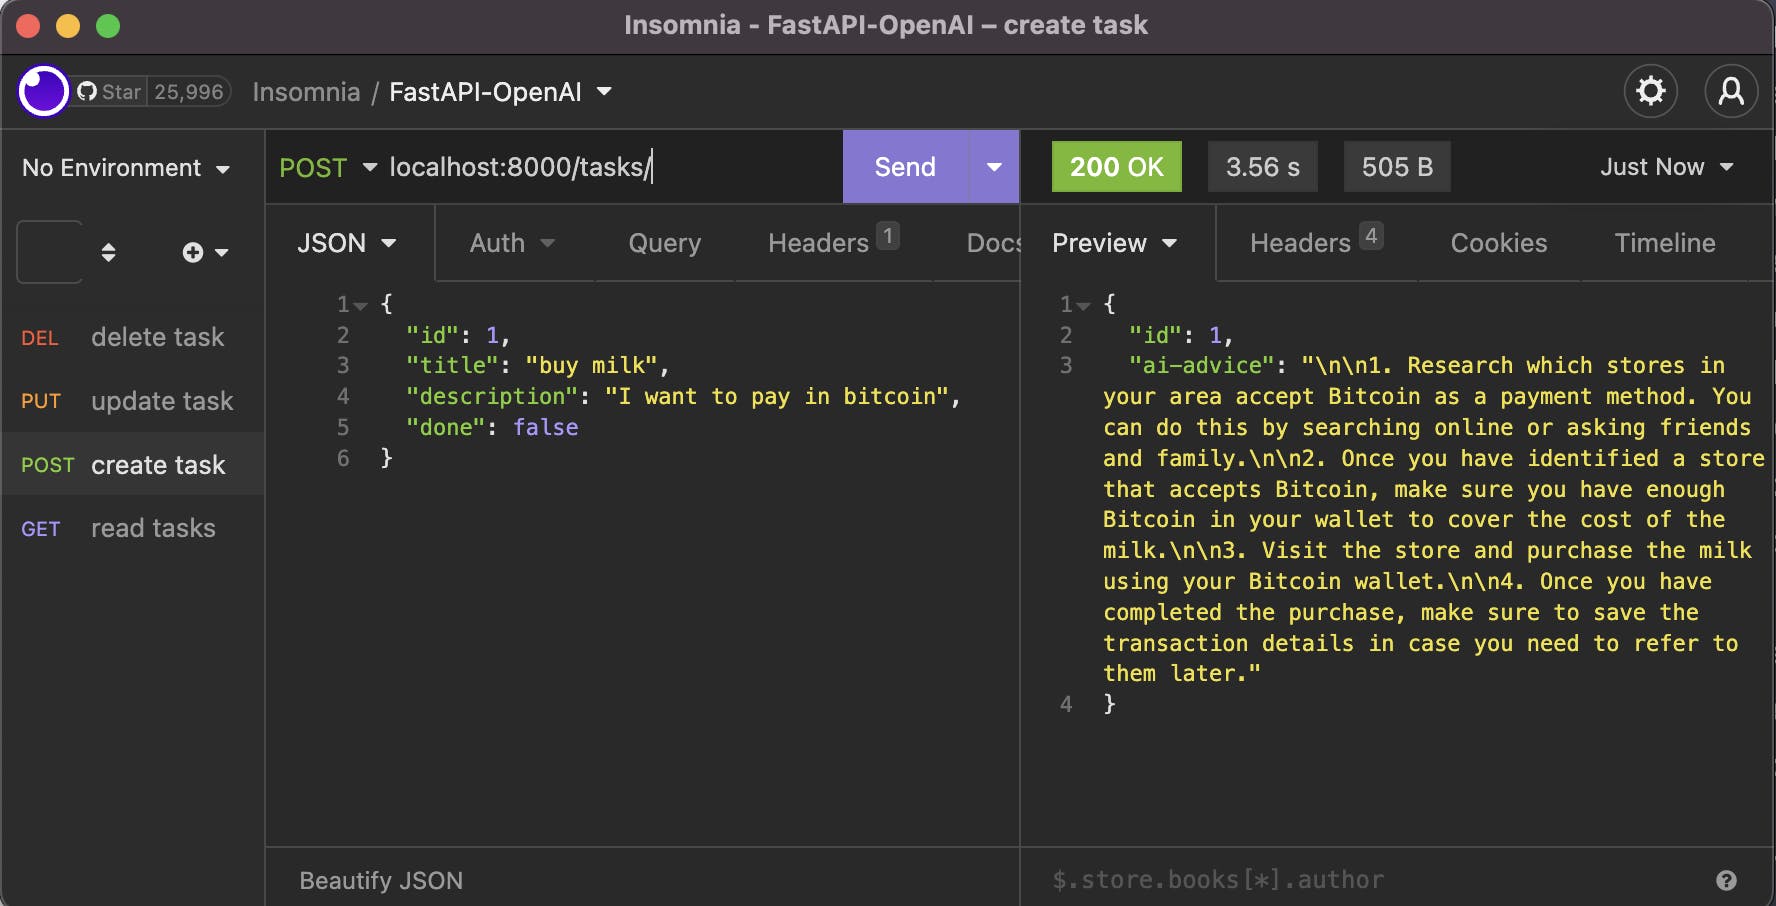
Research which stores in your area accept Bitcoin as a payment method. You can do this by searching online or asking friends and family.
Once you have identified a store that accepts Bitcoin, make sure you have enough Bitcoin in your wallet to cover the cost of the milk.
Visit the store and purchase the milk using your Bitcoin wallet.
Once you have completed the purchase, make sure to save the transaction details in case you need to refer to them later.
Now we have an AI-powered advice app to help you plan for your pending tasks!
Tips and considerations for using the OpenAI API in a FastAPI project
Here are some tips and best practices for using the OpenAI API in a FastAPI project:
Make sure to use the most recent version of the OpenAI API package and keep it updated.
Use environment variables to store your API key, rather than hardcoding it in your code.
Be mindful of rate limits and token usage when making requests to the API. You can check your usage and remaining tokens in the OpenAI API dashboard.
Test your code and the API with different inputs and parameters to ensure that it's working as expected.
Use the
asyncandawaitkeyword to call the OpenAI API asynchronously, this will help to prevent blocking the event loop and keep your application responsive.Be aware that the API can be quite slow, so it is a good idea to implement some sort of caching system to store the results of previous requests, so you don't have to make the same request multiple times.
Be aware that the API can be quite slow, especially when dealing with large prompts or when using models that require high computing power. Be prepared to handle timeouts and implement retries if necessary.
If you are expecting a large number of users to use your application, consider using a task queue to handle requests to the OpenAI API.
Make sure to handle errors properly and provide meaningful feedback to the user if something goes wrong when calling the API.
Be aware of the cost associated with using the OpenAI API, especially when using models that require high computing power, and plan accordingly.
Conclusion
Using OpenAI API in a FastAPI project can be a great way to add advanced language processing capabilities to your application, and we already saw how easy it was to implement it in our To-do project and be able to give ai-generated advice with a couple of lines of code. But, don't forget that it does require careful planning and testing to ensure that it integrates smoothly and performs well in production.
I encourage you to start playing with and implementing the OpenAI API into your own application. A whole new world of use cases will arise from the new tool that anyone can have access to now.